这是本次MVC3讲座中的一个话题,整理出来给大家参考参考
名词解释
依赖注入:英文是Dependency Injection。有时候也称为反转控制(Ioc)吧。不管名词怎么讲,它的大致意思是,让我们的应用程序所依赖的一些外部服务,可以根据需要动态注入,而不是预先在应用程序中明确地约束。这种思想,在当前的软件开发领域,为了保证架构的灵活性,应该还是很有意义的。
在MVC这个框架中,为依赖注入的设计提供了先天的支持。结合一些我们熟知的DI组件,例如NInject,我们可以较为容易地实现上述提到的功能。
场景介绍
我们的应用程序,需要支持各种不同的数据源,而且我们希望日后可以很容易地切换,不会因为数据源的变化而导致对Contoller或者Model,或者View做修改。
本文完整源代码,请通过这里下载 MvcApplicationDISample.rar
演练步骤
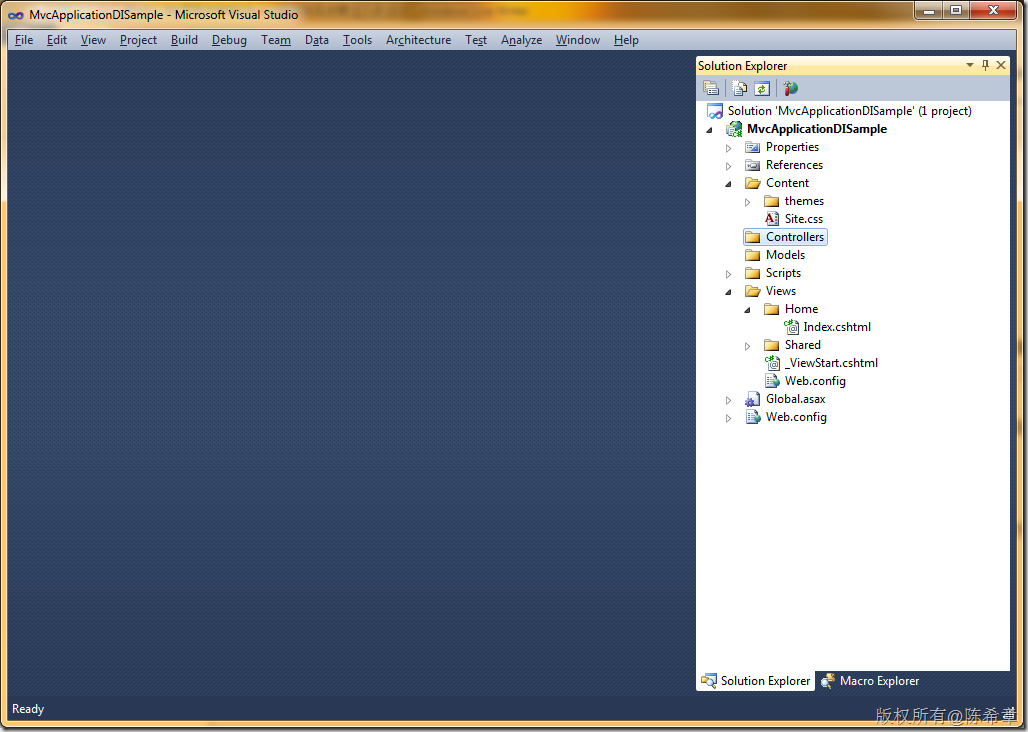
第一步:准备一个MVC项目(选择空白模板)
第二步:准备一个业务实体类型
using System;
using System.Collections.Generic;
using System.Linq;
using System.Web;

namespace MvcApplicationDISample.Models
{
    public class Employee
    {
        public int ID { get; set; }
        public string FirstName { get; set; }
        public string LastName { get; set; }
    }
}
第三步:准备一个数据访问的接口定义
using System;
using System.Collections.Generic;
using System.Linq;
using System.Text;

using MvcApplicationDISample.Models;

namespace MvcApplicationDISample.Services
{
    public interface IDataService
    {
        Employee[] GetEmployee();
    }
}
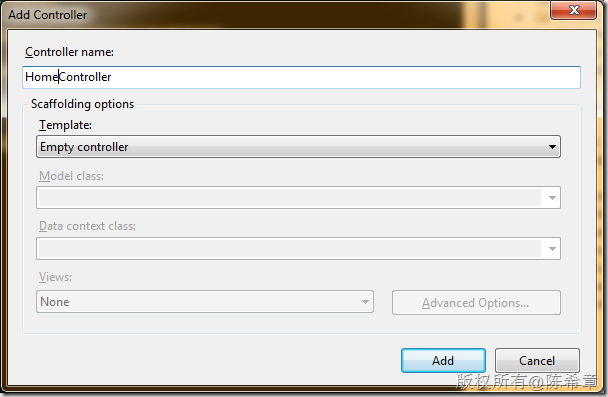
第四步:创建一个HomeController
using System;
using System.Collections.Generic;
using System.Linq;
using System.Web;
using System.Web.Mvc;
using MvcApplicationDISample.Services;
using MvcApplicationDISample.Models;


namespace MvcApplicationDISample.Controllers
{
    public class HomeController : Controller
    {

        IDataService DataService;
        public HomeController(IDataService service)
        {
            DataService = service;
        }

        //
        // GET: /Home/

        public ActionResult Index()
        {
            var data = DataService.GetEmployee();
            return View(data);
        }

    }
}
注意,这里需要为HomeController添加一个特殊的构造函数,传入IDataService这个接口。通常,所有的DI组件都是通过这样的方式注入的。
在设计HomeController的时候,我们不需要关心到底日后会用具体的哪种DataService,我们只是要求要传入一个IDataService的具体实现就可以了,这就是DI的本质了。
到这里为止,我们该做的准备工作基本就绪了。下面来看看如何结合DI组件来实现我们的需求
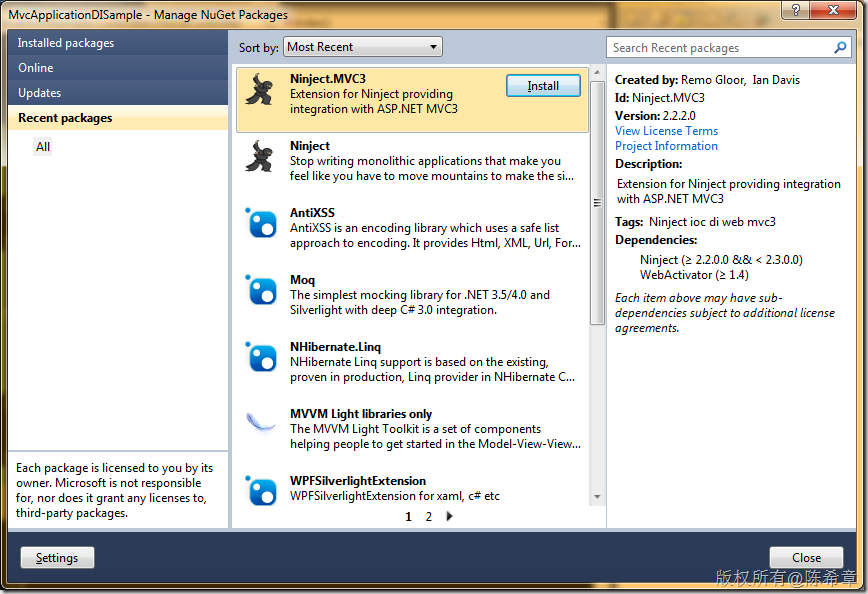
第五步:引入NInject组件
这是我比较喜欢的一个DI组件。它还针对MVC3专门有一个扩展
添加这个组件之后,除了自动添加了很多引用之外,还有一个特殊的文件App_Start\NinjectMVC3.cs
[assembly: WebActivator.PreApplicationStartMethod(typeof(MvcApplicationDISample.App_Start.NinjectMVC3), "Start")]
[assembly: WebActivator.ApplicationShutdownMethodAttribute(typeof(MvcApplicationDISample.App_Start.NinjectMVC3), "Stop")]

namespace MvcApplicationDISample.App_Start
{
    using System.Reflection;
    using Microsoft.Web.Infrastructure.DynamicModuleHelper;
    using Ninject;
    using Ninject.Web.Mvc;

    public static class NinjectMVC3
    {
        private static readonly Bootstrapper bootstrapper = new Bootstrapper();

        /// <summary>
        /// Starts the application
        /// </summary>
        public static void Start()
        {
            DynamicModuleUtility.RegisterModule(typeof(OnePerRequestModule));
            DynamicModuleUtility.RegisterModule(typeof(HttpApplicationInitializationModule));
            bootstrapper.Initialize(CreateKernel);
        }

        /// <summary>
        /// Stops the application.
        /// </summary>
        public static void Stop()
        {
            bootstrapper.ShutDown();
        }

        /// <summary>
        /// Creates the kernel that will manage your application.
        /// </summary>
        /// <returns>The created kernel.</returns>
        private static IKernel CreateKernel()
        {
            var kernel = new StandardKernel();
            RegisterServices(kernel);
            return kernel;
        }

        /// <summary>
        /// Load your modules or register your services here!
        /// </summary>
        /// <param name="kernel">The kernel.</param>
        private static void RegisterServices(IKernel kernel)
        {
        }
    }
}
这个类型很有意思,WebActivator.PreApplicationStartMethod这个方法其实是注册了一个在MVC程序启动之前运行的方法。这些代码大家应该能看懂,它在CreateKernel中,添加一个新的Kernel(用来做注入的容器)。
第六步:创建一个IDataService的具体实现
using System;
using System.Collections.Generic;
using System.Linq;
using System.Web;
using MvcApplicationDISample.Models;

namespace MvcApplicationDISample.Services
{
    public class SampleDataService:IDataService
    {
        #region IDataService Members

        public Employee[] GetEmployee()
        {
            return new[]{
                new Employee(){ID=1,FirstName="ares",LastName="chen"}};
        }

        #endregion
    }
}
作为举例,我们这里用了一个硬编码的方式实现了该服务。
第七步:实现注入
回到App_Start\NinjectMVC3.cs这个文件,修改RegisterServices方法如下
       /// <summary>
        /// Load your modules or register your services here!
        /// </summary>
        /// <param name="kernel">The kernel.</param>
        private static void RegisterServices(IKernel kernel)
        {
            kernel.Bind<Services.IDataService>().To<Services.SampleDataService>();
        }
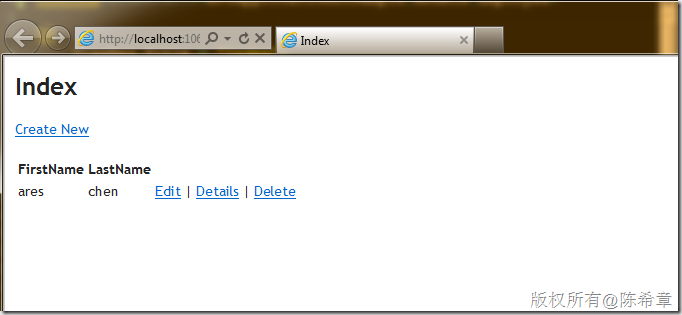
第八步:测试Controller的功能
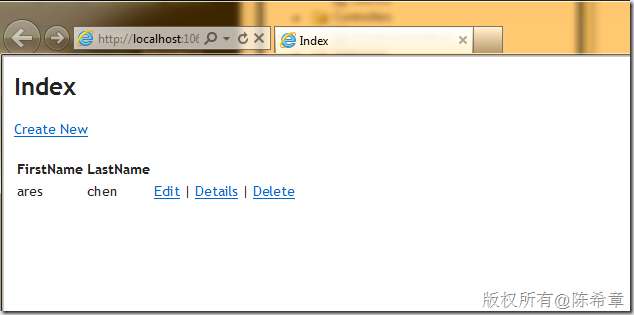
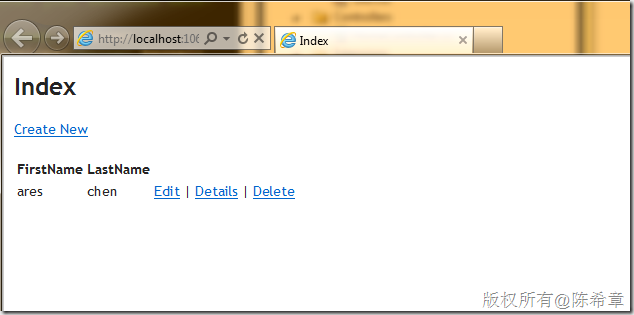
我们可以看到,数据已经展现出来了。这说明,HomeController中的Index方法,确实调用了我们后期插入的这个SampleDataService。而通过下图,则可以更加清楚看到这一点
到这里为止,我们就结合Ninject组件实现了一个简单的依赖注入的实例。Ninject 针对MVC 3有这么一个特殊的文件,可以极大地方便我们的编程。但即便没有这个文件,我们也可以通过另外一些方法来实现需求。
下面介绍两种比较传统的,通过扩展MVC组件实现的方式
第一种:实现自定义ControllerFactory
我们都知道,Controller其实都是由ControllerFactory来生成的,那么,为了给所有新创建从Controller都自动注入我们的服务,那么就可以从ControllerFactory这个地方动动脑筋了。
using System;
using System.Collections.Generic;
using System.Linq;
using System.Web;
using System.Web.Mvc;
using Ninject;
using MvcApplicationDISample.Services;

namespace MvcApplicationDISample.Extensions
{
    public class InjectControllerFactory:DefaultControllerFactory
    {

        private IKernel kernel;
        public InjectControllerFactory()
        {
            kernel = new StandardKernel();
            kernel.Bind<IDataService>().To<SampleDataService>();
        }
        protected override IController GetControllerInstance(System.Web.Routing.RequestContext requestContext, Type controllerType)
        {
            return (IController)kernel.Get(controllerType);
        }
    }
}
要使用这个自定义的 ControllerFactory,我们需要修改Global.ascx文件中的Application_Start方法,添加下面的粗体部分代码
        protected void Application_Start()
        {
            AreaRegistration.RegisterAllAreas();

            RegisterGlobalFilters(GlobalFilters.Filters);
            RegisterRoutes(RouteTable.Routes);

           ControllerBuilder.Current.SetControllerFactory(new Extensions.InjectControllerFactory());         }
这样做好之后,我们可以测试HomeController中的Index这个Action,我们发现它还是能正常工作。
第二种:实现自定义的DependencyResolver
顾名思义,这就是MVC框架里面专门来处理所谓的依赖项的处理器。可以说这是MVC专门为DI准备的一个后门。下面是我写好的一个例子
using System;
using System.Collections.Generic;
using System.Linq;
using System.Web;
using System.Web.Mvc;
using Ninject;
using MvcApplicationDISample.Services;

namespace MvcApplicationDISample.Extensions
{
    public class InjectDependencyResolver:IDependencyResolver
    {
        private IKernel kernel;

        public InjectDependencyResolver()
        {
            kernel = new StandardKernel();
            kernel.Bind<IDataService>().To<SampleDataService>();
        }

        #region IDependencyResolver Members

        public object GetService(Type serviceType)
        {
            return kernel.TryGet(serviceType);
        }

        public IEnumerable<object> GetServices(Type serviceType)
        {
            return kernel.GetAll(serviceType);
        }

        #endregion
    }
}
那么,如何使用这个自定义的处理器呢?
很简单,我们仍然是修改Global.asax文件中的Application_Start方法
        protected void Application_Start()
        {
            AreaRegistration.RegisterAllAreas();

            RegisterGlobalFilters(GlobalFilters.Filters);
            RegisterRoutes(RouteTable.Routes);

            //ControllerBuilder.Current.SetControllerFactory(new Extensions.InjectControllerFactory());

            DependencyResolver.SetResolver(new Extensions.InjectDependencyResolver());
        }
请注意,之前那个设置ControllerFactory的代码,我们可以注释掉了
这个解决方案的最终效果和之前是一样的。
本文完整源代码,请通过这里下载 MvcApplicationDISample.rar

